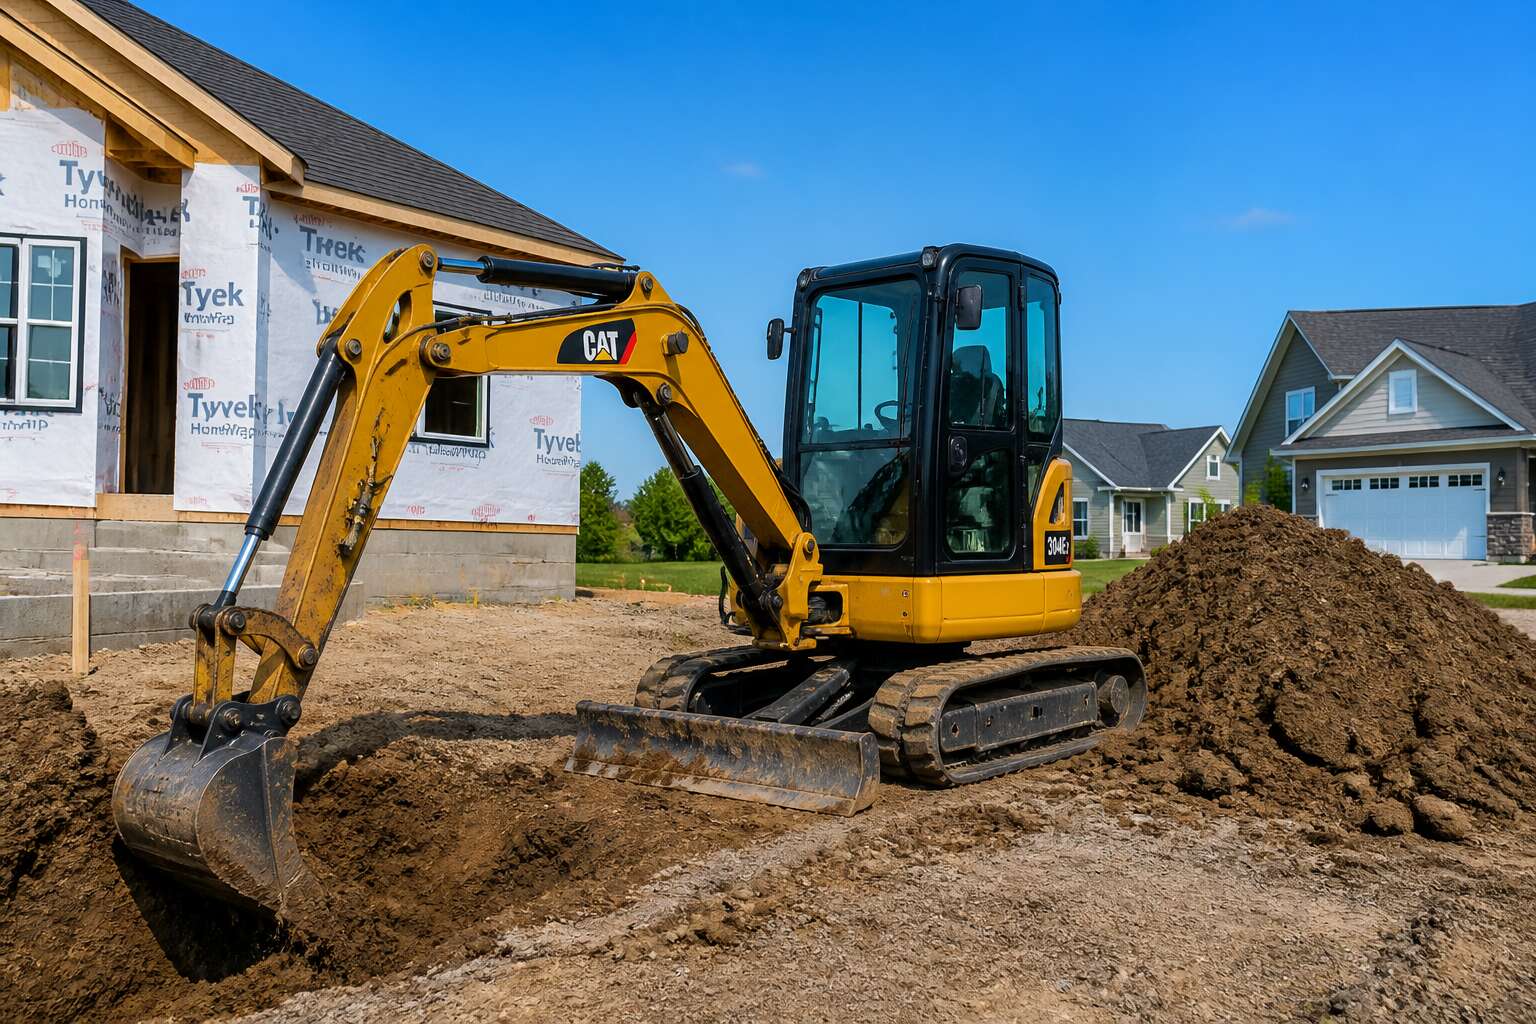
Understanding Compact Excavator Sizes and Classes
What Is a Compact Excavator?
In South Africa, the compact excavator now commands over 60% of new machine sales, a shift driven by denser inner city work. These machines, weighing between 1 and 10 metric tons, dig with surprising force for their narrow tracks.
Size classes follow a practical logic. Mini units stay under 3 tons, while mid sized models from 3 to 6 tons balance power with portability. The largest compacts, 6 to 10 tons, approach standard excavator capability. Here is a typical breakdown:
- Under 1.5 tons: micro class
- 1.5 to 3 tons: mini class
- 3 to 6 tons: midi class
- 6 to 10 tons: maxi class
Operating weight dictates everything from transport permits to attachment compatibility. So a fleet owner must read each class chart carefully before committing.
Compact Excavator Weight Classes
The practical logic behind these machines starts with the base classes, but the real differentiator is the work envelope. For a compact excavator, the weight determines the hydraulic flow and the structural strength of the boom, not just the track footprint. A 1-ton unit struggles with a 300mm auger, while a 9-ton model handles a 600mm bucket with ease.
Choosing the right machine involves matching the class to the specific task demands. Consider the primary job sites and material densities you encounter daily, since each tier offers a distinct power to weight ratio.
– Micro class: Best for interior demolition and tight landscaping.
– Mini class: The standard for utility trenching and drainage.
– Midi class: Offers sufficient reach for retaining wall construction.
– Maxi class: Delivers the breakout force for heavier foundation work.
Transport logistics also shift when you cross the 3-ton threshold. You might pull a mini behind a bakkie, but a midi or maxi compact excavator requires a dedicated lowbed trailer. Furthermore, the structural limits of floors and existing slabs in renovation projects often dictate what you can safely deploy. In these scenarios, the lighter footprint of the mini class is not a compromise, it is the only viable entry point. Every kilogram you add changes the machine’s center of gravity and its capacity to maneuver on soft ground, making the class chart a survival guide for urban sites.
Digging Depth, Reach, and Operating Weight Benchmarks
The difference between a machine’s quoted size and its actual capability becomes clear when you look at the work envelope. For a compact excavator, the digging depth and reach figures are the numbers that truly matter on site, not the brochure weight. A 1.5 ton unit might fit through a garden gate, but its 2 meter digging depth limits it to shallow trenches. Meanwhile, an 8 ton model offers over 4 meters of reach, allowing you to sit on the road and work over a retaining wall. These benchmarks dictate how you position the machine and plan the excavation sequence.
Operators often underestimate how operating weight shifts the center of gravity and lifting capacity. A heavier compact excavator provides counterweight for lifting heavy concrete pipes, but it also increases ground bearing pressure. On soft Highveld soils, that extra mass can cause sinking where a lighter unit would leave a clean surface. The dimensions of the undercarriage also affect stability, since a longer track base improves performance when digging at full depth but complicates transport to tight urban sites in Johannesburg or Cape Town.
– Digging depth ranges from 2 meters in micro units to 6 meters in maxi class models.
– Maximum reach at ground level determines how far you can dump spoil without repositioning.
– Operating weight, not horsepower, is the primary factor for lifting capacity on attachments.
These specifications form the real decision matrix. A contractor on the Garden Route dealing with sandy conditions and narrow plots will prioritize reach and a light footprint. A civil contractor on the Reef, working with compacted clay and hard rock, needs breakout force and counterweight. Matching the compact excavator dimensions to the material density and site constraints prevents costly downtime and avoids renting a machine that cannot finish the job. The physical limits of the boom and the stability of the chassis are the final arbiters of what you can achieve.
Compact Excavator Attachments That Maximize Jobsite Productivity
Standard and Specialized Bucket Options
On a tight urban site in Johannesburg, the difference between finishing on time and falling behind often comes down to what you bolt onto your compact excavator. Standard digging buckets handle the basics, but they rarely excel at fine grading or deep trench work.
Specialised attachments change that equation. A narrow trenching bucket carves clean slots without disturbing adjacent soil, while a wide grading bucket spreads spoil with a single pass. For rocky ground, a heavy-duty rock bucket with reinforced teeth saves hours of hammer work. Consider these options:
- Clamp buckets for handling logs or demolition debris.
- V-shaped ditch cleaning buckets for drainage maintenance.
- Angle-tilt buckets that twist and tilt for precise slopes.
Matching the bucket to the task cuts cycle times dramatically. I have seen operators double their daily output simply by swapping a worn general-purpose bucket for a purpose-built one. The compact excavator remains the same; the tool makes the difference.
Hydraulic Thumbs, Grapples, and Clamps
Hydraulic thumbs transform a compact excavator into a precise material handler. Operators can pick up rocks, sort debris, or hold logs steady for cutting. The thumb pins to the dipper arm and works with the bucket to grip materials firmly. This attachment eliminates the need for a second machine on site.
Grapples take productivity further. A grapple attachment handles brush, demolition waste, and uneven loads that buckets cannot grip. Clamps secure cylindrical objects like pipes and poles during lifting or placement.
- Hydraulic thumbs for mixed materials and sorting tasks
- Grapples for bulk debris and brush clearing
- Clamps for pipes, timber, and other round loads
On Johannesburg sites, these attachments reduce manual labour and speed up cycle times.
Hydraulic Breakers and Demolition Attachments
The concrete wall sat heavier than the machine sent to take it down. An operator can hammer away with a bucket and get nothing but a headache. The hydraulic breaker, once bolted to the arm, is capable of several hundred impacts per minute and treats concrete as a series of fractures instead of a solid mass.
This is not about the size of the iron. It is about breakout force. For a compact excavator in the three to five tonne class, the breaker’s specified flow rate must match the carrier’s hydraulic output. Get that wrong, and the tool stalls or takes a beating. On Johannesburg demolition sites, the wrong match costs you a full day of production and torches the machine’s pump.
- Hydraulic breakers for basement slabs and road foundations
- Pulverisers that separate rebar from crushed concrete
- Grapple units for clearing uneven demolition debris
I have watched an afternoon contract shrink to two hours because someone picked a pulveriser over the standard bucket. That choice also kills haulage costs, since the debris leaves clean and ready for recycling. On Gauteng, the compact excavator with dedicated demolition tools goes from being a support machine to the one when the new foundation goes in. Choose your hardware with the same care you choose your team.
How to Match Attachment Hydraulic Flow and Pressure
A hydraulic mismatch on a compact excavator does more than slow down a job. It can silently destroy the machine’s pump while the operator wonders why production has dropped. The attachment’s flow requirement must sit comfortably within the carrier’s auxiliary output. On South African sites, where machines often run hard through summer heat, a 400 millibar pressure differential can mean the difference between a clean break and a seized tool.
The practical approach starts with the manufacturer’s spec sheet, not the salesman’s promise.
– Confirm the attachment’s rated operating pressure against the excavator’s relief valve setting.
– Verify the flow rate at the excavator’s mid throttle, not the full rev setting.
– Check the return line backpressure if you are running long hose lengths.
Getting these numbers right matters more than the brand name on the attachment. A well matched unit from a local supplier will outperform a premium import that runs at the wrong pressure. The compact excavator becomes a precise instrument when the hydraulic system works as one unit. Operators who understand this relationship can switch between a tilt rotator, an auger, and a compactor without losing a morning to adjustments. The machine stops being a problem and becomes the solution. That is the real productivity gain, and it comes from attention to hydraulic details, not from buying bigger iron.
How to Operate a Compact Excavator Safely and Efficiently
Pre-Operation Inspections and Daily Checks
Every compact excavator has its own warnings before the key turns. A walkaround is not bureaucracy, it is survival. Look for hydraulic weepage along the boom, bent pins on the bucket, and cracks in the undercarriage. Also check track tension with a glance at the sag.
I spend five minutes with the machine before climbing aboard. That habit has caught loose bolts and a damaged hose. The daily checks are straightforward but non negotiable.
- Inspect engine oil, coolant, and hydraulic fluid levels
- Test the control levers for resistance or drift
- Confirm the horn and backup alarm work
- Straighten the seatbelt and adjust the mirrors
Start the engine and let it idle for a minute. Then cycle every function slowly. A smooth, consistent motion tells you the machine is ready for the day. This ritual halves unexpected downtime and keeps everyone on site safer.
Stability, Track Positioning, and Digging Techniques
A compact excavator is only as efficient as its footing. On South African sites, ground conditions change without warning, from dolomite to waterlogged clay. Stability begins with track positioning. Keep both tracks firmly planted and square to the excavation face before the bucket touches soil. A blade lowered to the ground acts as a stabiliser, transferring weight forward and reducing pivot strain.
Digging technique follows the same logic. Begin each cycle with a shallow bite, allow the teeth to penetrate, then curl the bucket while lifting gently. This sequence preserves hydraulic pressure and prevents the machine from rocking. Trenching parallel to a slope demands extra care. Position the heavier side of the machine uphill and dig within the track line, never reaching beyond the counterweight.
I reposition the compact excavator more often than I used to. Those extra thirty seconds per cycle keep the machine balanced and the work steady.
Trench Safety, Shoring, and Underground Utility Hazards
The ground you just excavated can fall back on you. That is physics. Many South African operators skip shoring to save time, then the job ends permanently. A compact excavator cannot outrun a collapsing trench wall.
Before any digging, call for utility clearance. Underground cables and water pipes do not reveal their positions. One miscalculation can combine electricity and water in the same trench. Treat every unmarked line as live until proven dead.
- Spoil piles belong at least one metre from the edge.
- Shoring becomes mandatory when depth exceeds 1.2 metres.
Shoring prevents collapses. Position the compact excavator perpendicular to the trench, never parallel. For deep cuts, step the trench or use hydraulic shoring. Rely on ground conditions and the law, not your memory of yesterday’s trench.
Fuel-Saving Operating Habits for Compact Excavators
A compact excavator running at full throttle burns fuel like a machine that knows no better. The engine note changes when you back off the lever, and the machine still digs. Most operators use full RPM out of habit. The gauge tells a different story.
Throttle discipline separates profitable work from expensive rituals. A compact excavator can clean a trench at half throttle, then take a full swing to break through hard ground. The pause between passes, the moment when the operator checks the grade, that is where diesel slips away. High idle burns roughly a litre per hour on many models.
Planning the dig matters. Each reposition consumes time and fuel. Operators who place the machine once and work within its arc spend less and finish earlier. The blade levels as the machine moves. Every wasted swing becomes wasted diesel, and the tank is always watching.
Compact Excavator Buying Guide: New vs. Used and Total Cost
Compact Excavator Price Ranges by Size
In South Africa, demand for the compact excavator has climbed nearly 18% in three years, pushing buyers to weigh new against used options carefully. A new machine offers full warranty, latest emissions compliance, and predictable maintenance, but it demands a heavier upfront investment. Used units lower the entry barrier, yet hidden wear on hydraulics or undercarriage can erase those savings quickly. A pre-purchase inspection by a certified technician is non-negotiable.
Price ranges vary widely by operating weight, so expect these benchmarks:
- 1 to 3 tons: R350,000 to R800,000 new; R150,000 to R400,000 used.
- 3 to 6 tons: R800,000 to R1.5 million new; R400,000 to R900,000 used.
- 6 to 10 tons: R1.5 million to R2.5 million new; R900,000 to R1.6 million used.
These figures shift with brand, hours, and attachment packages, but they give a solid negotiating baseline. Always factor in delivery, licensing, and potential rebuild costs before signing anything.
Leasing vs. Buying a Compact Excavator
The purchase price tells only half the story. A compact excavator bought new carries depreciation the moment it leaves the dealership, but it also brings predictable operating costs for the first several thousand hours. A used unit avoids that initial drop in value, yet savings can evaporate when an injection pump or swing frame fails without warranty cover.
Leasing shifts the burden of residual value entirely. Monthly payments become a fixed operating cost, and the compact excavator can be returned or upgraded when the term ends. Contractors who run machines continuously may find leasing more costly over five years than buying outright. Those who face gaps between contracts often prefer the flexibility of a rental agreement with service included.
The decision matrix includes:
- expected utilisation rate per month
- access to mechanics and parts suppliers
- tax treatment of lease payments against capital depreciation
Each factor moves the total cost equation in a different direction.
Financing Options and Operating Costs
The machine that sits on your lot for three weeks without work still demands attention. Depreciation, insurance, and finance charges do not pause for downtime. Every contractor in South Africa knows this reality, yet the decision between a new and used compact excavator often comes down to a single figure: the sticker price. That approach masks the real math.
A new compact excavator arrives with a full warranty, zero accumulated wear, and the latest emissions compliance. The operator steps into a clean cab with responsive hydraulics. The trade-off is immediate depreciation. A machine loses a significant portion of its value in the first few years. A used unit, by contrast, has already absorbed that initial hit. The purchase price looks attractive. But the previous owner’s maintenance habits become your problem. An injection pump failure or a cracked swing frame can erase the savings in one repair cycle.
The total cost of ownership includes purchase price, finance interest, insurance, fuel, routine maintenance, and major repairs. For a new compact excavator, routine costs stay predictable during the warranty period. For a used machine, expect variability. A pre-purchase inspection from an independent mechanic is non-negotiable; it reveals hydraulic cylinder wear, undercarriage condition, and any signs of overheating.
Financing a used compact excavator often carries a higher interest rate than new equipment loans. Banks view used machinery as higher risk. Some lenders require larger deposits or shorter repayment terms. A contractor with strong cash flow may buy used outright, but that removes capital from other opportunities. Leasing a new unit through a dealer programme can spread costs but restricts the total operating hours, so match the agreement against your projected workload.
Operating costs break down into three areas:
– Fuel consumption, which varies with engine age and load management
– Wear parts, including tracks, buckets, and filters
– Labour for scheduled maintenance and unexpected downtime
A used machine with 5,000 hours may need an undercarriage replacement within 12 months. That cost alone can reach a quarter of the original purchase price. A new compact excavator with a 3,000 hour maintenance plan shifts that expense to the manufacturer. The decision matrix also includes the local dealer network. Whether you choose new or used, parts availability and technician response times in your region matter more than any spec sheet.
The South African market offers both options in abundance. Auction houses list ex-fleet machines with service histories. Dealers push new models with bundled attachments. The contractor who tracks every rand spent per hour on the previous machine will make the better choice. That hourly figure, not the upfront sticker, tells the truth about what a compact excavator costs you. Some operators keep a spreadsheet; others rely on memory. The spreadsheet wins every time.
Inspection Checklist for Used Compact Excavators
A compact excavator’s true cost reveals itself only after years of service, not at the handshake. New machines tempt with warranties and zero-hour reliability, yet their upfront price stings. Used units lure with lower numbers but carry hidden wear. The decisive factor is total cost: purchase price plus fuel, parts, and downtime. For a used compact excavator, your inspection checklist decides everything. Examine the undercarriage for track wear and sprocket damage. Check hydraulic hoses for cracks and leaks. Test the boom and arm for sagging. Review the service history for engine overhauls or pump replacements. Also, look for rust in the fuel tank and coolant discoloration. A machine that fails these points will drain your budget faster than any new-model payment. Match your choice to job-site demands, not sticker panic.
Dealer Support, Warranties, and Parts Availability
The dealer network is the true difference between a new and used compact excavator. A fresh machine carries a factory warranty, which transfers risk from your ledger to the manufacturer. A used unit often saves money upfront but loses that protection. In South Africa, parts availability can stall a project for weeks, especially for imported brands. Confirm that your nearest dealer maintains stock for the model you want. At a minimum, verify three things before purchase:
- Whether the dealer keeps hydraulic hoses and filters on hand.
- How quickly a technician can reach your site.
- Whether the warranty covers wear items like tracks and seals.
These details shape the real cost. The total cost of ownership includes service intervals and response times alongside the purchase price.
Resale Value and Future Upgrade Considerations
Most buyers fixate on the purchase price, yet the true measure is what a compact excavator returns at resale. New machines shed value quickly in the first 3,000 hours. A well-chosen used unit may hold its floor better, but only if service records are flawless. Resale value depends on whether you matched the hydraulics and attachments to your actual workload across the whole ownership period.
Future upgrade considerations matter just as much. Retrofitting a high-flow circuit later is costly. If you intend to add a breaker or tilt rotator, spec the auxiliary system now. The same logic applies to the compact excavator market in South Africa, where model demand shifts with infrastructure cycles.
Consider before buying:
– Depreciation curves for the brand locally
– Track and undercarriage condition as the main value driver
– Future demand for the specific model when you sell
Buy with resale in mind. That discipline protects capital whether you choose new or used.
Compact Excavator Maintenance and Common Repairs
Daily, Weekly, and Hourly Maintenance Schedules
Your compact excavator will tolerate a fair amount of abuse, but it draws the line at neglected grease fittings. Most premature failures trace back to skipped maintenance, not manufacturing defects. The hourly schedule matters most. Every eight hours, you should grease the boom pivot, bucket pin, and swing bearing. That is non-negotiable.
Daily checks cover fluid levels, coolant, and hydraulic oil. Weekly, you inspect track tension and look for worn sprockets or leaking cylinders. Common repairs follow a predictable pattern: replaced hoses, rebuilt cylinders, and track adjuster issues.
- Check hydraulic oil level every morning
- Grease all pivot points every eight hours
- Inspect tracks for wear weekly
Stick to these intervals and your compact excavator will keep working. Skip them and you will learn what a replacement swing bearing costs.
Undercarriage Care and Track Wear Management
South African ground is tough on machinery, and the first place a compact excavator feels that is in its undercarriage. Coarse sand and gravel get packed between tracks, drive sprockets and rollers. These active surfaces carry the full weight of the machine, so the friction is constant. Most owners only hear the problem when the tracks start slipping, and by then the warnings have already turned into premature wear.
Track wear management is about readings, not guesswork. The track must sag at the correct same point and the bushing must not get squeezed by stones. What helps is a quick glance at the undercarriage before the day starts.
- Sprocket teeth having visible hooking profiles
- Idler flanges with shiny, torn edges
- Roller spindles or the nuts holding them working loose
Rolling resistance and same travel, each brings a repair bill. Track wear signatures are usually easy to compare with the roadside gradients you already know. Replacing the track chain comes down to the call that the sprocket was left for too long, and that repeat mistake is the most expensive part of compact excavator ownership.
Hydraulic Fluid, Filters, and Contamination Control
With the undercarriage handled, the heart of any compact excavator beats through its hydraulic system. That oil is the lifeblood of every boom swing, bucket curl, and track drive. Contamination is the silent killer here. Fine silica dust from African soil or a grain of sand from a river bed can score a pump’s internals in a single working day.
Protecting that investment starts with a few non-negotiables:
– Use the correct OEM or equivalent filtration rating.
– Replace hydraulic fluid and filters at the interval stated for your conditions.
– Always use a filter cart when changing oil.
– Perform a water-in-oil test at every service.
Hydraulic fluid that passes a basic visual check can hide invisible issues. Testing reveals the true story. A small investment in sampling beats a failed drive motor. That is the difference between planned maintenance and a catastrophic breakdown.
Troubleshooting Common Compact Excavator Issues
A compact excavator rarely fails without warning. Recognizing which noise or hesitation deserves a second look is the real skill. Boom drift, for instance, usually means a cylinder seal has failed internally. Slow bucket curl could indicate worn pump swash plates or a clogged relief valve.
Start with these diagnostic steps:
- Check the hydraulic oil level and condition first. Low oil causes cavitation, a high-pitched rattle that damages the pump.
- Inspect the pilot filter and screen. A blocked pilot circuit creates jerky or delayed controls.
- Test the track drive motor after a long push. A hot motor indicates internal leakage.
Each check reveals a different story! The most common repairs on a compact excavator involve replacing cylinder seals, rebuilding drive motors, and adjusting track tension. None of those require a full teardown, but each demands attention before a small leak turns into a catastrophic failure.
Winter Storage and Cold-Weather Operation
Frost on the cab windows of a compact excavator in the Karoo means the hydraulic oil has already thickened. Cold weather changes clearances in the main control valve, so the swing cylinders respond with a delay that feels like mechanical failure.
Winter storage in the inland provinces stresses the same parts summer heat does, but for different reasons. Seals stiffen, rubber tracks contract, and condensation collects inside the fuel tank. Overnight moisture can freeze and block the pilot filter.
- Drain condensation from the fuel and hydraulic circuits each morning
- Run the engine at low idle for five minutes before operating the controls
- Recheck fluid levels after the system reaches operating temperature
A compact excavator that starts easily in winter was often stored with the bucket flat and the boom lowered. That simple position takes pressure off the cylinder seals and prevents the cold from settling into the joints.



0 Comments