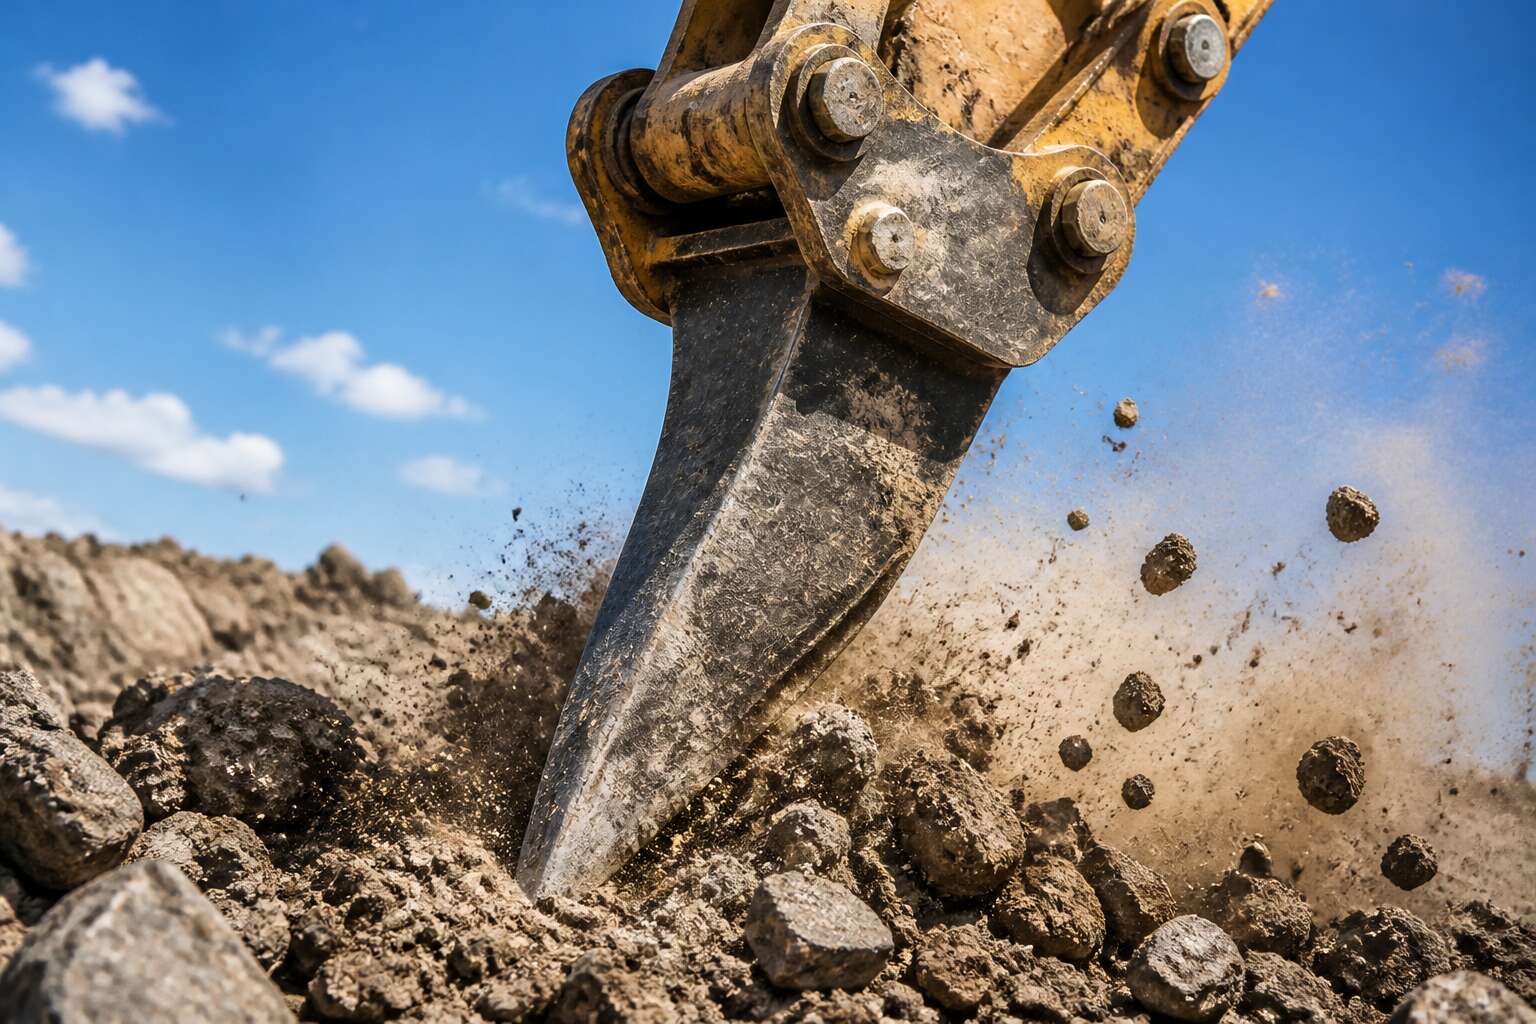
Understanding the Ripper Attachment for Heavy Equipment
What Is a Ripper and How Does It Work?
In South African hard rock conditions, the excavator ripper often outperforms blasting on cost and safety. A ripper is a single or multi shank attachment that uses the machine’s hydraulic force to tear through compacted ground, weathered rock, or even frozen layers.
The shank penetrates with a replaceable tooth. As the excavator pushes forward, the angle of the shank and the down pressure create a tensile fracture. This breaks the material into manageable pieces without explosive permits or vibration concerns.
- Single shank for deep, concentrated ripping
- Multi shank for broad, shallow coverage
Operators control the ripper through the standard bucket circuit. The attachment converts the excavator’s breakout force into a horizontal pulling action. I have watched this tear through calcrete that would stall a standard bucket entirely. That action, pure and direct, is what separates a ripper from digging tools.
Core Components: Shank, Tooth, and Bracket
A ripper is only as good as its three working parts, and each has a distinct personality. The shank is the load-bearing body that transfers the excavator’s breakout force into the ground. It must flex slightly without taking a permanent set. The tooth is the sacrificial layer at the tip, a replaceable point that meets the rock first. In South African conditions, abrasive calcrete and quartzite wear teeth with alarming speed, which is why the excavator ripper design favors replaceable points over integrated tips. The bracket, meanwhile, is the quiet component that holds the shank to the machine, and it receives more abuse than anyone acknowledges!
I have watched operators blame a dull tooth when the real fault sat in a worn bracket. The three parts work as one system. An excavator ripper fails when one component gives up before its time, and the ritual of blaming the tooth is a reliable sign of an inexperienced crew.
Ripper vs. Bucket: Comparing Performance in Hard Ground
A bucket in hard ground scrapes, stalls, and burns through cutting edges at a rate that turns simple trenching into a budget emergency. The excavator ripper breaks ground along a single fracture line, using machine weight and hydraulic force rather than abrasive contact.
Consider a site in Mpumalanga with weathered dolerite. A bucket might produce 40 tonnes per hour while wearing its teeth to stubs. The ripper loosens the material first, so the bucket becomes a loading tool rather than a digging tool. That separation changes the economics of the job.
- Ripping lowers shock loads transmitted to the boom and stick.
- It reduces fuel burn per tonne moved.
- It preserves bucket tooth life by avoiding direct contact with virgin ground.
In practice, the decision comes down to reading the ground. I have watched crews switch to an excavator ripper and cut hourly costs by a third on fractured rock. When the ground does not fracture cleanly, you are simply pushing steel into stone.
The Physics of Ripping: Leverage and Breakout Force
No machine component tests an operator’s patience like a ripper shank that refuses to bite. The physics of an excavator ripper reduce to leverage and breakout force. The bracket holds the shank at a fixed angle, and that angle translates machine weight into pressure at the tooth tip.
Breakout force shifts with:
- Depth of shank penetration
- Angle of the boom relative to the track base
- Hydraulic flow rate available at that moment
- Condition of the tooth tip
Each variable changes the effective force. A worn tooth spreads pressure and reduces bite. A shallow angle lifts the machine instead of driving the shank deeper. Operators feel these differences through the cab floor long before the machine struggles. The excavator ripper demands that you read the ground. I have watched operators face this choice: commit more force and risk stalling, or back off and reset the angle.
Different Types of Rippers and Their Ideal Use Cases
Single-Shank Rippers for Maximum Penetration
A single-shank ripper channels the entire hydraulic output into one point of attack, which makes it the decisive option for maximum penetration. In South African conditions, this setup handles tough karoo dolerite and silcrete where multi-shank rippers lose traction.
The efficiency lies in how it directs energy. A single tooth sinks deeper, creates a wider fracture, and requires less downtime for maintenance. I’ve seen operators choose it for selective ripping, where following a specific geological layer matters more than raw speed.
Here are the prime conditions for deploying an excavator ripper with a single shank:
- Deep cuts in cemented gravel
- Breaking frozen or heavily compacted ground
- Precise work near pipelines or foundations
For softer material, a multi-shank ripper increases output, but the single-shank remains more effective in dense ground.
Multi-Shank Rippers for Large-Scale Soil Loosening
Multi-shank rippers trade penetration for coverage. Two or three teeth mounted on a common bracket distribute breakout force across a wider footprint. This makes them the appropriate excavator ripper attachment when the objective is loosening large volumes of moderately compacted soil, not splitting stubborn rock.
The advantage is clear in South African gold mine overburden or weathered shale. A multi-shank ripper breaks material into manageable fragments in a single pass. Operators then switch to a bucket for loading. The tradeoff is real. Each shank receives less force, so ground that resists a single tooth can stop the entire machine.
Ideal use cases for a multi-shank excavator ripper include:
- Ripping clay-rich soils before dozer spreading
- Preparing agricultural land for deep ploughing
- Clearing decomposed dolerite in road construction
When production volume matters more than point pressure, multi-shank rippers deliver.
Radial vs. Parallel Rippers: Which Offers Better Control?
A quiet rivalry exists between radial and parallel rippers, and it comes down to control. Radial rippers trace an arc, so the shank angle shifts with every centimetre of depth. This gives the tooth room to navigate seamy ground. Parallel rippers keep the shank at a constant angle, which delivers uniform breakout force and predictable depth. In my experience, the parallel design feels composed on stratified formations.
Here is where each geometry earns its keep:
- Radial suits fractured shale and mixed overburden.
- Parallel suits precise excavation in competent rock.
For most excavator ripper work in South Africa, the parallel linkage is the steadier choice. The radial design remains a valuable option for an excavator ripper operator facing variable ground within a single pass.
Adjustable Rippers and Specialized Configurations
The standard excavator ripper is a fixed tool, but the ground is rarely fixed. I have seen operators waste hours on material that needed a different angle. Adjustable rippers change that. A hydraulic variable-angle ripper lets you alter the shank angle mid-pass. That matters when you transition from hard rock to softer overburden.
Specialized configurations solve niche problems. A ripper with a swivel bracket allows the tooth to follow uneven seams. A multi-tooth ripper with staggered teeth works for soil loosening, not rock fracturing.
- Ripper with replaceable teeth for quick wear swaps
- Twin-shank ripper for parallel trenches
- Ripper with a compaction wheel for landfill work
For South African conditions, adjustable excavator ripper models handle dolomite and dolerite well. The right configuration reduces cycle time and saves fuel. Choose based on material, not habit.
Why Ripping Attachments Boost Efficiency on Job Sites
Breaking Dense Rock and Frozen Ground With Ease
Dense rock and frozen ground stall standard buckets. An excavator ripper converts machine weight into focused penetration. This approach removes the need for pre-blasting in many cases. Operators can fracture material that would otherwise require drilling. The result is faster cycle times and lower operating costs.
For South African sites, this matters where hard dolerite or frozen highveld conditions slow production. I have seen rippers tear through ground that left other attachments helpless. The shank drives downward with the machine’s full breakout force. Fracture lines spread through the material.
A ripper can address several obstacles:
– Rock layers with high compressive strength
– Frozen ground that resists bucket penetration
– Compacted gravel and cemented soils
This means fewer support machines on site. Fuel consumption drops. Productivity rises. The excavator ripper is not a complex tool, but it changes how quickly ground yields.
Lower Operating Costs Compared to Blasting or Hydraulic Hammers
On South African sites, the excavator ripper quietly outperforms both blasting and hydraulic hammers when it comes to operating costs. Blasting demands permits, drilled holes, and explosive handling. Hammers pound away with fuel-hungry persistence. A ripper relies on the machine’s own weight and breakout force instead.
That distinction shows up on daily cost sheets. One operator can fracture dolerite without a support crew. Fuel burn drops, and maintenance intervals stretch further. The lack of percussion means less vibration stress on the host machine, which extends component life.
- No explosives licensing delays
- Lower noise and vibration on site
- Fewer wear parts than hammer service schedules
Each pass of the excavator ripper opens fracture lines that a bucket could never exploit. Work continues at a steady rhythm, with fewer machines idling nearby and fewer invoices for consumables. For contractors in the highveld, this translates directly into more tenders won on price.
Minimizing Downtime by Preserving the Excavator’s Main Components
Most excavators don’t die from overwork. They die from shock loading. An excavator ripper changes that by converting hydraulic power into steady tensile force. The shank digs in, the machine’s weight does the rest. No percussion, no impact slamming into the boom. That reduces stress on swing gears, main pins, and track frames. Maintenance intervals stretch because the machine avoids the violent micro-cracks hammer attachments cause.
I have seen operators switch from a hydraulic breaker to an excavator ripper and report fewer hydraulic leaks within a month. The ripper preserves the excavator’s original design life. Downtime drops when principal components stay intact. Here is what benefits:
- Boom and stick weldments face lower fatigue loads
- Swing bearings see fewer shock spikes
- Track tensioners wear evenly
Operators on Highveld sites notice the difference within a week.
Enhancing Versatility Across Construction, Mining, and Demolition
Ground conditions on South African sites rarely stay uniform. An excavator ripper adapts without slowing production. The same machine that digs trenches can loosen bedrock for road construction, then switch back in minutes. Efficiency improves because the ripper works with the excavator’s natural hydraulic force.
Construction teams use it to strip weathered material before foundations. Mining operations break overburden for efficient load and haul cycles. Demolition crews split reinforced slabs into manageable pieces.
The excavator ripper delivers:
– Faster cycle times in mixed ground
– Reduced need for secondary breaking equipment
– Lower fuel consumption per cubic metre moved
Versatility across these industries comes down to one tool that never needs air pressure, explosives, or a second attachment.
How to Choose the Right Ripper for Your Excavator Model
Matching Ripper Size to Machine Tonnage and Hydraulic Flow
In South Africa’s demanding mining and construction sectors, the wrong excavator ripper can cost you an entire shift. Hydraulic flow is the first thing to check, because it dictates how much force reaches the shank tip. A 30 ton machine pushing a ripper designed for a 15 ton unit will starve the attachment of oil, causing sluggish penetration and unnecessary heat buildup.
Match ripper size to machine tonnage using these three checks:
- Compare the ripper’s rated shank length to your excavator’s breakout force.
- Verify the hydraulic flow requirement against your machine’s pump output in litres per minute.
- Confirm the bracket pin spacing aligns with your excavator’s arm width.
An undersized excavator ripper lacks the mass to drive through dense dolerite, while an oversized one stresses the boom and swing gear. The result is always the same: broken teeth and wasted diesel.
Assessing Soil Type, Hardness, and Compaction Levels
South African ground has a talent for lying. The surface shows soft brown till, and two feet down you hit a hardpan layer that ruins undersized equipment. Choosing an excavator ripper without assessing soil hardness first is a mistake.
Start by digging test trenches across the site. Observe how the material breaks. Sandy loam fractures easily. Compacted calcrete resists. Fractured dolerite is unyielding. Each soil type changes the ripper configuration, from shank length to tooth angle.
Compaction levels control penetration speed. Heavily compacted layers make the ripper work harder, increasing wear on the tooth and bracket.
The typical South African soil profile looks like this:
- Clay and silt: moderate penetration, low wear on the excavator ripper
- Calcrete and hardpan: high impact, heavy-duty shank needed
- Dolerite and shale: extreme force, reinforced bracket essential
Quick Coupler Compatibility and Pin Options
Choosing the wrong excavator ripper attachment often starts with the pin code. South African excavators range from 8 ton units to 80 ton mining giants, and each manufacturer uses different pin diameters, centres, and lug widths. A ripper built for a Komatsu PC200 will not align with a Volvo EC220 without the correct bracket conversion. I have seen operators discover the mismatch only after lifting the attachment into place.
Quick coupler compatibility changes the geometry. When the attachment mounts through a coupler, the ripper gains extra standoff distance, which alters the breakout angle. The coupler’s locking pins determine the effective reach.
Pin options typically include:
– Standard round pins with grease channels
– Oversized pins for high impact applications
– Quick coupler adaptor plates
Each option changes wear patterns and service intervals.
Choosing Shank Length and Tooth Shape for Specific Terrain
Selecting the correct shank length for your excavator ripper depends on the material you intend to fracture. A longer shank provides deeper penetration but demands more breakout force. On the Highveld’s dense clay, a shorter shank with a sharp tooth outperforms a longer unit.
Tooth shape follows terrain. A narrow, chisel-point tooth suits hard rock, while a broader blade tooth handles compacted soil without stalling. For mixed conditions in Gauteng, a reversible tooth, flipped when the leading edge wears, works well.
- Shank length should match the depth of the material layer.
- Chisel teeth suit rock, blade teeth suit clay.
I have seen operators overlook the link between shank length and lift capacity. An excavator ripper that works on a 20 ton machine may be useless on a 12 ton unit, not because of pin fit, but because the longer shank creates leverage the smaller machine cannot control.
Best Practices for Safe and Effective Ripping Operations
Pre-Operation Checks: Hydraulics, Wear, and Tightening
A ripper that fails mid-pass costs more than time; it compromises the entire excavation. Before any ground is broken, the excavator ripper demands a disciplined inspection. Hydraulic lines must be examined for pressure drops or weeping seals, as a subtle leak here robs the shank of its penetration force. Wear on the tooth and shank tip reduces breakout efficiency, while loose bracket bolts allow destructive vibration to travel into the boom. A practical checklist keeps this routine honest:
- Check hydraulic hoses for cracks or bulges
- Measure tooth wear against factory specs
- Torque all bracket and pin fasteners to recommended values
Tightening is not a one-time event; ground shock can loosen connections within hours. Performing these checks each morning turns a potential breakdown into a simple adjustment.
Optimal Ripping Speeds and Angle Adjustments
Somewhere between impatience and inertia lies the ideal ripping speed. An excavator ripper that enters the ground too fast merely skips across the surface, wasting hydraulic force. One that crawls grinds its tooth into powder. Let the machine settle into a steady throttle. I find the pressure gauge a reliable guide to the shank’s progress.
Angle adjustments for the excavator ripper demand the same attention. Soft, weathered ground rewards a shallower shank angle. Dense rock asks for a steeper cut. A practical reference:
- 15 degrees for loose, uncompacted soil
- 25 degrees for weathered shale or hardpan
- 35 degrees for blocky granite or dolerite
Safety follows from restraint. Avoid sudden directional changes mid-pass; the ripper must be fully seated before any crowd or lift action begins. Operators who allow the shank to find its own path reduce shock loads and protect the excavator’s structure for the next job.
Avoiding Unnecessary Stress on the Boom, Stick, and Swing
Ripping passes with an excavator ripper send shock loads that trip the relief valve and rattle the boom. That force flows into the boom, stick, and swing, fatiguing steel and wearing bearings. Easing into the cut rather than slamming the shank down preserves those components. Keep the boom low so the force vector runs along the machine’s strongest axis.
Sudden swing reversals with a buried tooth strain the turntable. Let the excavator ripper work in line with the tracks when the ground allows. If you must angle the pass, move the swing in small increments.
- Let machine weight, not hydraulic pressure, do the work.
- Keep swing movement minimal below grade.
The feedback arrives through the seat and the levers. Smooth inputs read as steady pressure. Harsh inputs read as vibration. I trust that signal. The ripper rewards patience, and the boom, stick, and swing last longer for it.
Operator Positioning and Ground Stability Guidelines
Your body’s position in the cab determines what you read. Sit too low and you lose the angle of attack. Sit too far forward and the shank tip disappears. The excavator ripper sends ground resistance up through the boom. Feel that line through the seat and levers.
Ground stability matters. I run through three checks every time:
- Level the tracks on solid ground.
- Inspect the surface under the counterweight.
- Look for old trench lines or hidden cracks.
A machine on a slope or soft edge turns a ripping pass into a rollover risk. That base holds all the force you are about to send downward! I stop and reposition if the tracks sink or the machine rocks. The excavator ripper will shake loose material, but the machine should not shake itself.
Monitoring Wear Patterns to Schedule Timely Replacements
I track wear on the excavator ripper the way I track fuel burn, with a record book and a critical eye. The shank tip loses its point slowly, then all at once. A dull tooth increases breakout force demands, and that extra strain reaches the boom, the pins, and the operator’s spine.
After forty hours of service, I measure the shank against its original length. I look for grooves along the leading edge and inspect the tooth seat for galling. Cracked brackets hide under paint, so I clean the area and run a file over the surface to expose the faint lines.
- Check the wear gauge each shift.
- Replace teeth in pairs to keep the angle true.
- Log hours per ripper to predict changes.
Replacement costs rise sharply when a tooth breaks mid-pass. Schedule the swap while the steel holds its shape. The excavator ripper then works without surprise failures.
Troubleshooting Common Ripping Issues on Excavators
Dealing With Pockets of Hard Rock or Unexpected Obstructions
A buried obstruction can bring an excavator ripper to a halt. In South African ground, that usually means a dolerite boulder or a weathered ironstone ledge hiding under the topsoil. The machine rocks back, the shank deflects, and production drops to zero.
Recognising the difference between a soft patch and a solid obstacle is the first step. In my experience, a ripper that suddenly loses its bite while the engine note stays steady is likely riding over a hard surface. If hydraulic pressure spikes and the tracks slip, something solid is underneath.
Common signs include:
- A sudden change in vibration through the cab floor
- The shank making a ringing sound instead of a dull grinding noise
- Visible lifting of the ground ahead of the tooth
Raising the shank, repositioning, and approaching the pocket from another angle is the safer route. Forcing the excavator ripper through an obstruction bends the shank and stresses the swing gear. It rarely breaks the rock.
Preventing Bent Shanks and Broken Teeth in Abrasive Conditions
Bent shanks and broken teeth seldom announce themselves with drama. In abrasive South African soils, they reveal themselves through a subtle change in the ripper’s rhythm. The excavator ripper starts to bounce, the tooth loses its edge, and production quietly slips. I have seen operators mistake this for a hard pocket, but the cause is different: wear, not resistance. The shank bends because the tooth no longer cuts cleanly, forcing the steel to absorb lateral strain. Broken teeth follow when the bracket has loosened from constant vibration.
A quick observation of the tooth’s tip and the shank’s alignment tells the story. The wear pattern reveals itself after a few hours of work.
- A shiny spot on the shank’s side indicates rubbing against rock.
- A tooth that measures shorter than a new one shows premature wear.
- A metallic clatter on each pass signals a loose bracket.
Each sign points to a different failure mode. The excavator ripper asks for attention before it breaks entirely.
Traction Problems: Recovering When Tracks Lose Grip
Losing traction during a ripping pass is rarely a failure of the machine itself. When the excavator ripper meets a resistant layer, the tracks often lose their bite on slick clay or polished bedrock. I have watched operators counter this by dropping the blade or curling the bucket, but the real fix lies in the relationship between the ripper’s force and the machine’s weight.
A quick sequence helps when the ground turns greasy under the grousers:
- Reduce ripping depth by half.
- Pulse the crowd control to shift weight forward.
- Listen for the pitch change in the engine as the tracks bite again.
The traction problem disappears when the excavator ripper’s line of pull aligns with the sprocket. A slight lift of the boom redistributes mass onto the front idlers. This recovers grip without sacrificing the shank’s position.
Diagnosing Excessive Vibrations and Hydraulic Pressure Spikes
The cost of a single unplanned stop in a South African mine can eclipse the price of a new excavator ripper shank. Yet operators often ignore the earliest warnings. Excessive vibration during a ripping pass is not a nuance, it is a mechanical confession. The hydraulic system speaks first, usually through pressure spikes that swing beyond the relief valve setting. I have watched a seasoned operator shut down a machine because the shock loads felt like a jackhammer through the cab floor.
When vibration becomes rhythmic, inspect the ripper pocket and the shank nose for wear.
– Check the tooth retainer for movement under load.
– Confirm the shank pin has no lateral play.
– Look for cavitation marks on the hydraulic hose near the cylinder port.
Pressure spikes demand a different diagnosis. They often trace back to the accumulator charge or a mismatched flow setting on the main control valve. A compact excavator ripper running on a machine with excess flow will hammer the cylinder end cap. Compare the actual pressure readout against the technical manual, not the gauge on the dash. The machine’s weight and the ripper’s angle of attack determine how much energy returns to the stick. A deep bite on fractured shale creates a stick-slip effect, which translates directly into hydraulic shock. Reducing the engine RPM slightly during initial penetration often smooths these oscillations without losing ground speed.


0 Comments